Monday 28 March 2011

Garden transformation

A few months ago, Chris and I bought our first house! To put it mildly the house could be described as a fixer-upper, and since we took ownership in October we have been fixing-up like mad. Initially, of course, efforts were focused on the insides of the house, to make it habitable and considerably less ucky looking. We're currently in the middle of having a new kitchen fitted which should drastically reduce the ucky factor of the house.

For my birthday, several of my lovely friends made me a 'garden voucher' which entitled me to an afternoon of work in the garden from them. Given they know how much I want to be growing my own fruit and veg in the garden and to make it a generally pleasant place to be, this was a wonderful present. On Saturday I cashed in my voucher, and I document the resulting garden below!


Here's the garden before the transformation began. "Doesn't look too bad" I hear you say.. well just wait until you see what we found when we dug a bit deeper..
The plan was as follows:- to remove the hedge on the left-hand side to allow for raspberry canes, and gooseberry bushes and other good things; to tidy the end of the garden and make it a composting haven, rather than the composting hell it was at the time; dig over some areas to use as veggie plots to grow yummy food!

Here's the bottom of the garden, where it seems all the random crap was dumped..This is where the new compost bins were to go, but before this could happen the area needed levelling and clearing.
This is where Alan and I began, to the soundtrack of England being completely destroyed by Sri Lanka in the Cricket. What seemed like a simple task soon became otherwise, as we unearthed several large blocks of render that clearly used to be stuck to the side of the house!


As the afternoon progressed and we set Anna to finding the random crap buried in the 'lawn', and Cat started on demolishing the unwanted hedging, we discovered that render was actually one of the more sensible things buried.. Above you can see a badminton racquet found in the grass (with Anna posing, and illustrating  that no, we hadn't just put the grass on top..)  We can also see Cat with some of her discoveries, namely a badminton net, a bed-head and then later on a bicycle!! Hanging in the tree we found several action men.. I guess the previous occupants had something against them? The bottom-right panel is all the stuff that was dug out of the composting area, and you can just about see the shiny new compost bins behind.


Here's Cat looking triumphant with the destroyed hedge, you can see the remains in the background behind her (these will be killed and then the raspberries planted along the fence). You can see that we really did find a bike in there!

And here's the hired muscle, Chris (not the one I bought the house with), who hacked away at the hedging with a pruning saw and helped speed along the destruction..

Here's a picture of how the garden looked when we'd all called it a day.. The hedge was ingeniously and very neatly bundled with twine by Hélio and Chris. Various beds were dug by Janina, Anna, Hélio, Chris and Alan, and Alan planted my rhubarb which has been languishing in a tub for about two years now, waiting for a garden to be planted in. Chris and I were most impressed and happy with the results of an afternoon's labour :)

While the garden transformation took place (and there is more that I haven't documented here, such as the blueberry bushes!) Chris (the one I did buy the house with, and to whom I am soon to be married) was a busy busy bee transporting an inordinate amount of waste to the tip that came from the kitchen destruction. Hopefully I will soon be able to show you the transformation of the kitchen from ugly duckling, into a fully kitted out kitchen, that's actually nice to cook in!


And here, for a splash of colour, is a picture of my quince bush, in full bloom! This is one of the few things in the garden that was here before we moved in, and that we really want to keep! 


Wednesday 16 March 2011

A Special Shawl

The reason that the March socks have not progressed much so far is because of this shawl.
The pattern is Laminaria by Elizabeth Freeman, and I think it is beautiful. I am using Malabrigo lace, in Natural, which is blissfully soft to the touch. I find myself absent-mindedly stroking the shawl while knitting it..


I'm following the pattern as for the shawl, so did 6 repeats of the star chart and am now on the 4th blossom repeat. 


Here's a closer view of the stars and blossoms in their unblocked state. I'm very happy with how they're coming out so far. 

I stretched the blossoms out on the carpet to simulate blocking, and they seem to look blossomy to me!
Depending on how big the shawl seems after the suggested 8 blossom repeats I might do one or two extra. I bought three skeins of Malabrigo and haven't even finished the first yet so I should certainly have enough yarn!

Monday 14 March 2011

February sock club - the finished article(s)

I'm happy to say that February's "emergency" socks were finished well within time, and their new owner is very happy with them. Here are his feet enjoying their new stripy coverings:-


Peculiarly, though the socks did not start out the same at the toe, and the same number of stitches were used for each sock, they ended up almost matching by the cuff! Some strange magic of the heel I guess..


I think next time I do stripy, or patterned socks I will give the afterthought heel a try.


March's socks are now underway (though going slowly, as I have a big project on the needles at the moment - to be revealed soon). I'm afraid I can't show you March's sock progress, as the socks are a present so must be kept secret, but once they have been handed over to their new owner all will be revealed. All I'll say for now is that they should be Legen... wait for it....

Saturday 5 March 2011

Transatlantic dressmaking

I need to make a dress for my bridesmaid, and as she lives the other side of the 'pond' this makes fittings awkward.. Therefore it was deemed necessary to make a mock-up that could be sent to the states and back (and back again if necessary) to get the fit right. Here is the progress i've made so far in making the mock-up, which i'm currently awaiting verdict on before starting the real thing.

The pattern is this one, but with several tweaks. We decided we didn't like the gathers at the waist, as they added too much bulk, and the gathering point is not hidden by the waistband. Our approach was to follow the pattern of pleats in the bodice but continue across the dress.


Please ignore all the basting on the bodice.. I didn't want to remove it yet, until I know if I need to adjust the bodice.

We also didn't much like the idea of the zip being in the back of the dress (given the back of bridesmaids is what people see most of the time) and Amy had the wonderful idea of moving the zip to the side. Hurrah for mock-ups as this allowed us to experiment quite a lot with the dress, in ways we never would have been able to leaping straight into the final product.. Plus I get to turn the mock-up into a party dress for myself! Win win ^_^


Much smarter back don't you think?

Once i've had instructions back on where the fit needs to be adjusted it will be full steam ahead on the real thing!

Friday 4 March 2011

Fake and Kidding Pudding

As promised, the recipe for fake and kidding pudding!

This recipe was developed by adapting the steak and kidney pudding recipe from how to be a domestic goddess and the recipe book that came with my pressure cooker. The process is as follows..

Ingredients

For the filling:-
1 packet (~300g)  sainsbury's frozen veggie mince (or Realeat veggie mince, i don't like Quorn mince)
150 g button mushrooms, sliced
1 large onion, finely chopped
1/2 teaspoon mustard powder
2 tablespoons mushroom ketchup
4 teaspoons vegetarian gravy powder
Enough water to make a 'gravy'
Oil for frying the onions

For the pastry:-
175 g  wholemeal self-raising flour (I like the doves farm one), you can use white flour, i just like to use wholemeal where possible.
pinch of salt
87 g vegetable suet
1/2 teaspoon mustard powder
water to make a dough

3 pint pudding basin (the plastic ones with clip on lids are easier, but i lost my lid..)
If you have a traditional pudding basin, you will also need string and tin-foil.
Pressure cooker, or big pan.

Cooking times
Filling ~20 min
If you are using a pressure cooker the pudding will take about 40 minutes, if you need to use a normal pan then steaming will take 2-2 1/2 hours.


Method
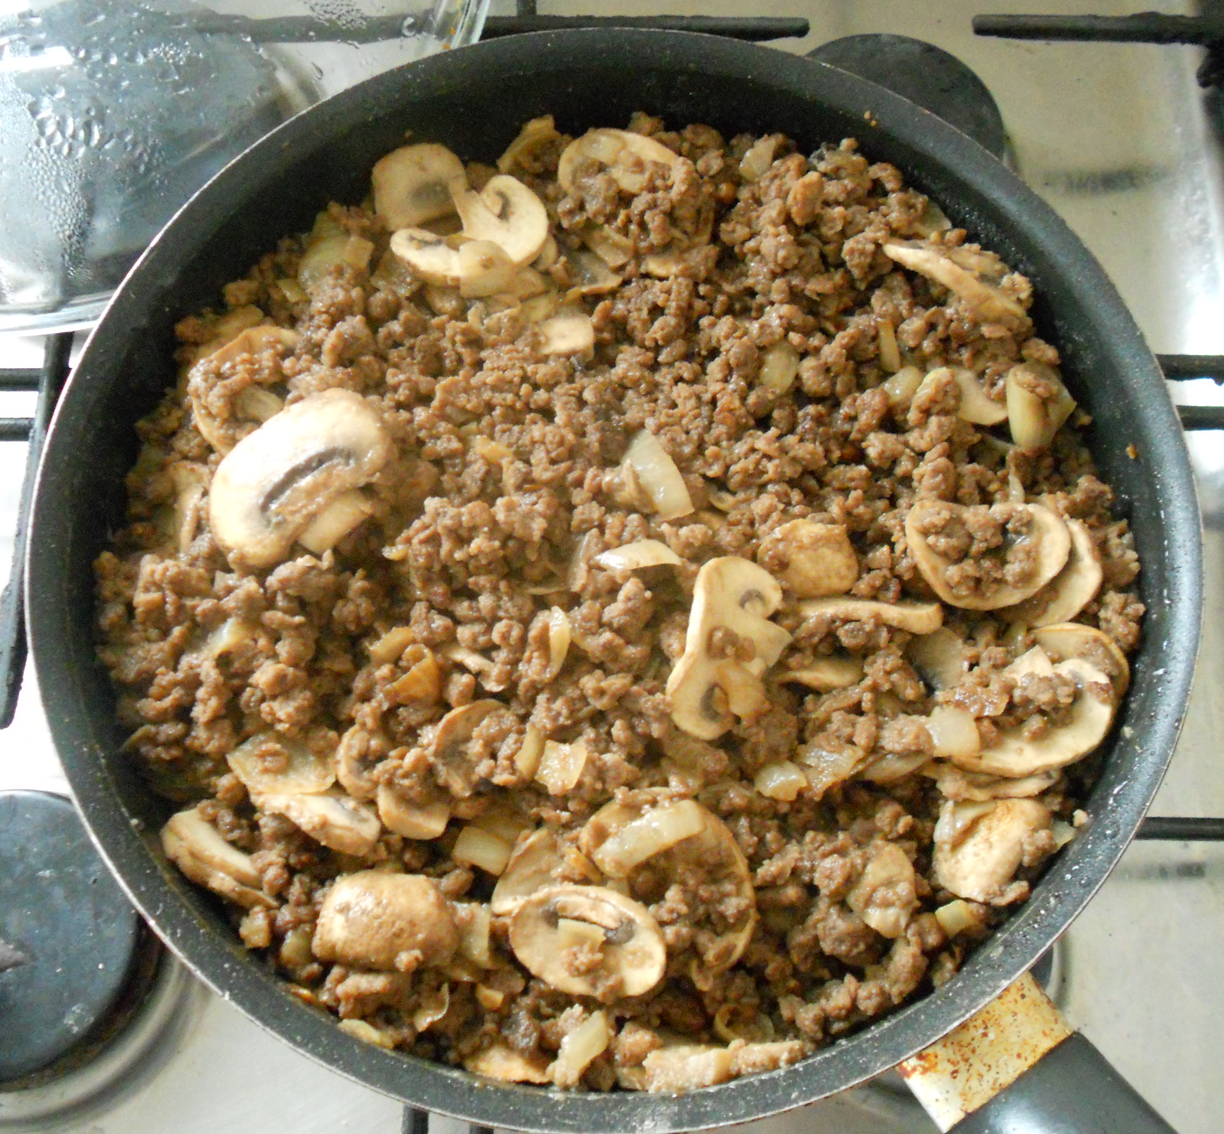
Fry the onion until slightly browned, then add the mince and musrooms. As things cook down add the gravy powder, mushroom ketchup and mustard powder and cook until it looks something like this -


I made the filling the day before, as this allows the flavours to develop better, but you can use the filling straight away. If using the same day, add enough water to make a bit of gravy in the pan, if using the next day do this just before assembling your pudding.

The next step is to make the pastry, which is easy peasy..
Grease your pudding bowl. Really well. There's nothing quite so disappointing as making a lovely pudding then when you tip it out of the basin, the pastry sticks and it all collapses..
If you have no pressure cooker then get your pan-full of water boiling now!, you'll need plenty. If you have a pressure cooker, just pop the kettle on (you won't need so much water) or put ~800 ml in the pan and bring to the boil.

Mix the flour, salt, mustard powder and suet in a bowl and then add enough water to make a firm dough. Roll out on a floured surface until it's about half a centimetre thick and then line the pudding basin, make sure you have enough left for the lid.

Pour your filling into the pastry-lined bowl, and then add a pastry lid taking pains to make sure the edges are well sealed.


If you have a plastic pudding bowl then the next step is easy, snap the lid on top and make sure it's shut all the way round. If, like me, you have a traditional pudding basin then you need to get out the string and tin-foil, and butter a piece of foil, make a pleat in it and then put it over the top of the basin. Using string attach the foil lid to the basin as shown below. Try to make yourself a string handle while you're at it, this will make pudding retrieval that much easier..


Now you are ready to cook your pudding!
For pressure cooker owners pop the water in the pan and then the pudding. Put the lid on and steam the pudding for ten minutes and then bring to pressure and cook for a further 25-30 minutes.

If you have no pressure cooker then immerse the pudding in the pan-full of water (not completely!) or in a steamer above the water and cook for 2-2 1/2 hours, keeping an eye on the water levels.

Once the pudding is cooked, snip the string (or pop off the lid) and reveal your pudding. Run a knife round the edge to make sure the pastry will come free from the basin and then pop a plate on top and flip to get your pudding on a plate. Gently remove the basin from the pudding (it's hot!) and lo and behold you will have a fake and kidding pudding!


Enjoy!